
When most people think about managing a Raspberry Pi, they immediately think of SSH.
And honestly, SSH is usually the best option.
It’s fast, lightweight, and perfect for server tasks.
But sometimes you need an actual desktop.
Maybe you’re:
This is where VNC becomes useful.
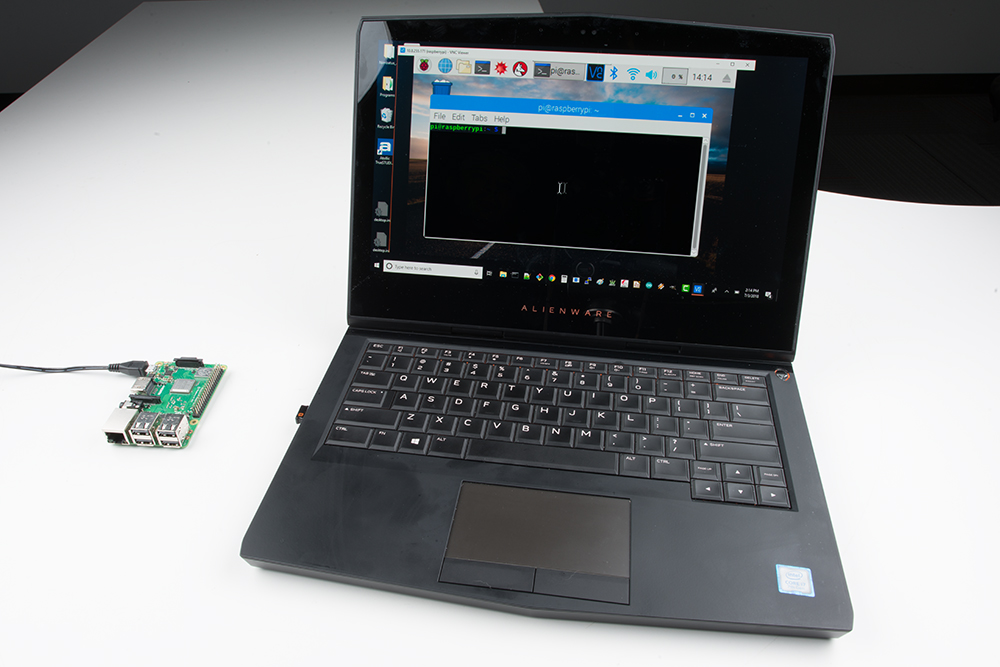
In my Raspberry Pi Zero 2 W setup, the Pi normally boots directly into the command line to keep RAM usage low. However, there are times when having remote desktop access is convenient.
Instead of connecting a monitor, keyboard, and mouse every time, I configured TigerVNC on DietPi.
The result was a lightweight remote desktop that could be accessed from anywhere on the local network.
A Raspberry Pi can already display a desktop through HDMI.
The problem is that physical access isn’t always convenient.
Imagine your Pi is:
Connecting peripherals every time becomes annoying.
With VNC:
Laptop
    ↓
Wi-Fi Network
    ↓
Raspberry Pi Desktop
Everything happens remotely.
No monitor required.
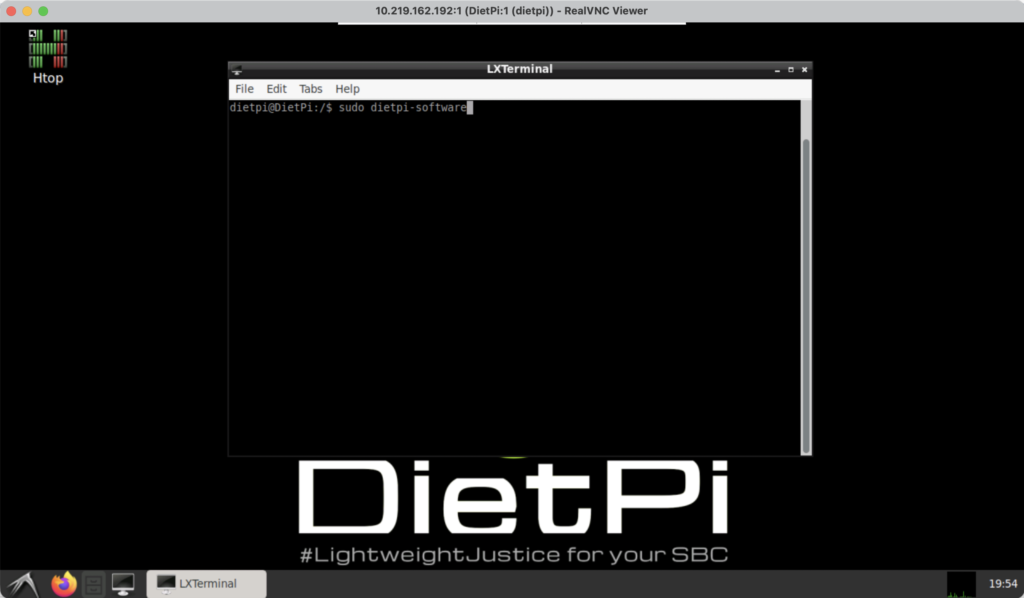
DietPi makes software installation easy through its built-in software manager.
Open:
sudo dietpi-software
Navigate to:
Browse Software
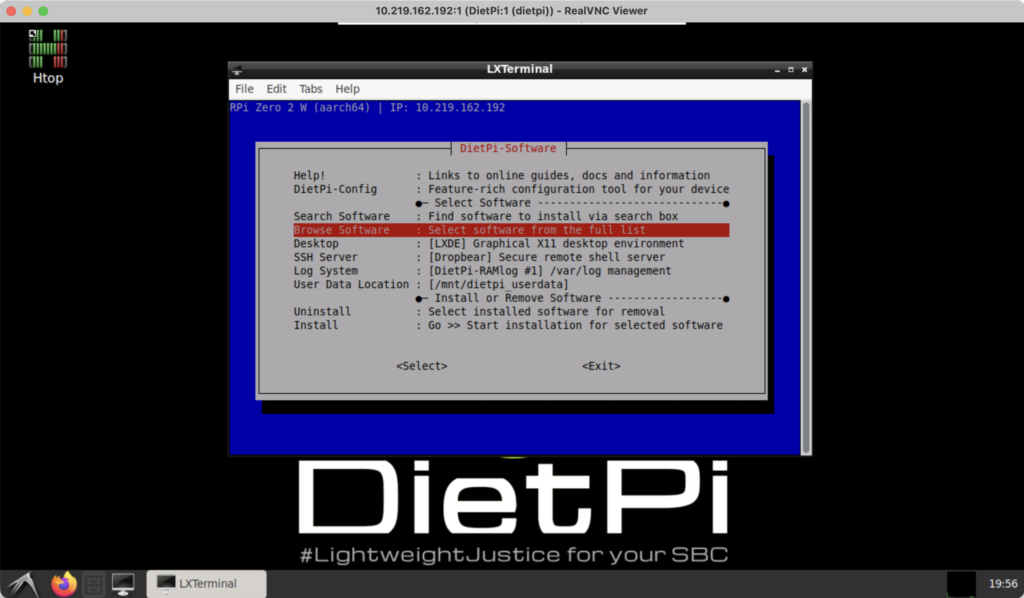
Navigate to:
Remote Desktop
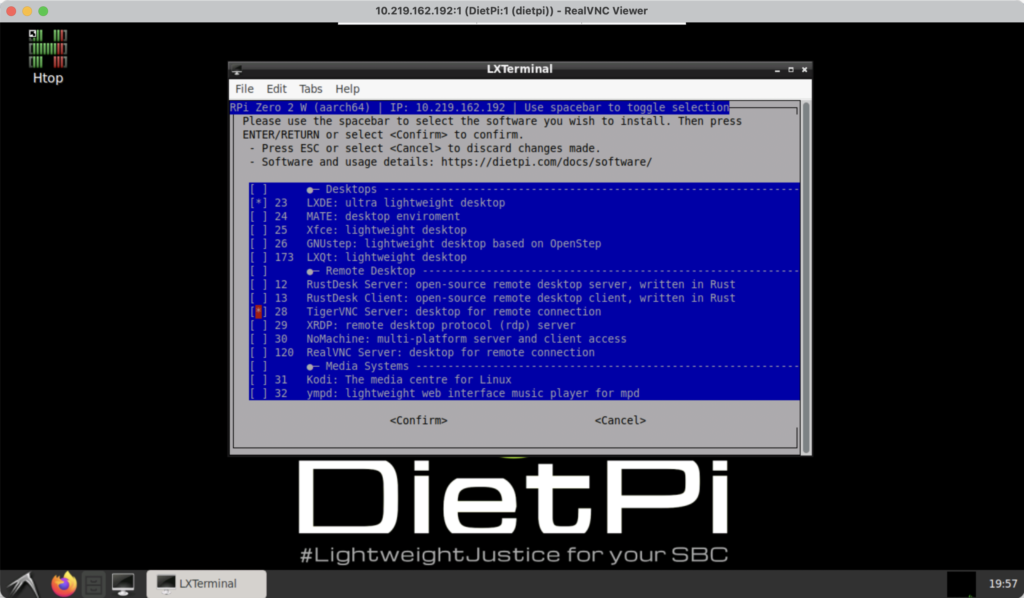
and select:
TigerVNC Server by pressing spacebarClick on Confirm and DietPi handles the package installation automatically.
Once installation completes, TigerVNC is ready to use.
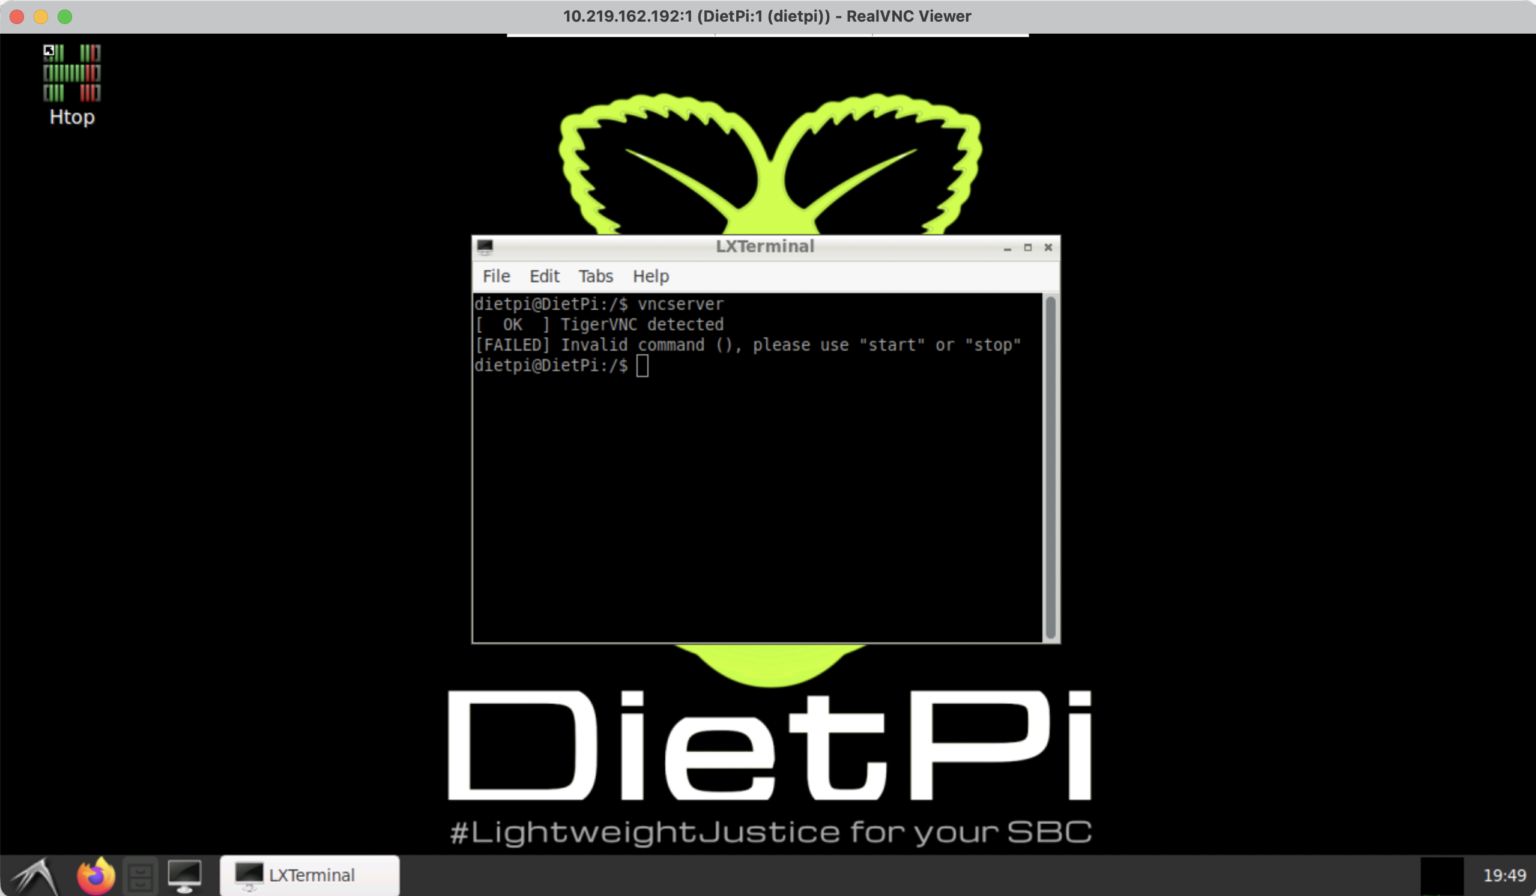
To launch the server:
vncserver start
The first time it starts, TigerVNC creates a desktop session.
You’ll see output similar to:
Display :1
Port 5901
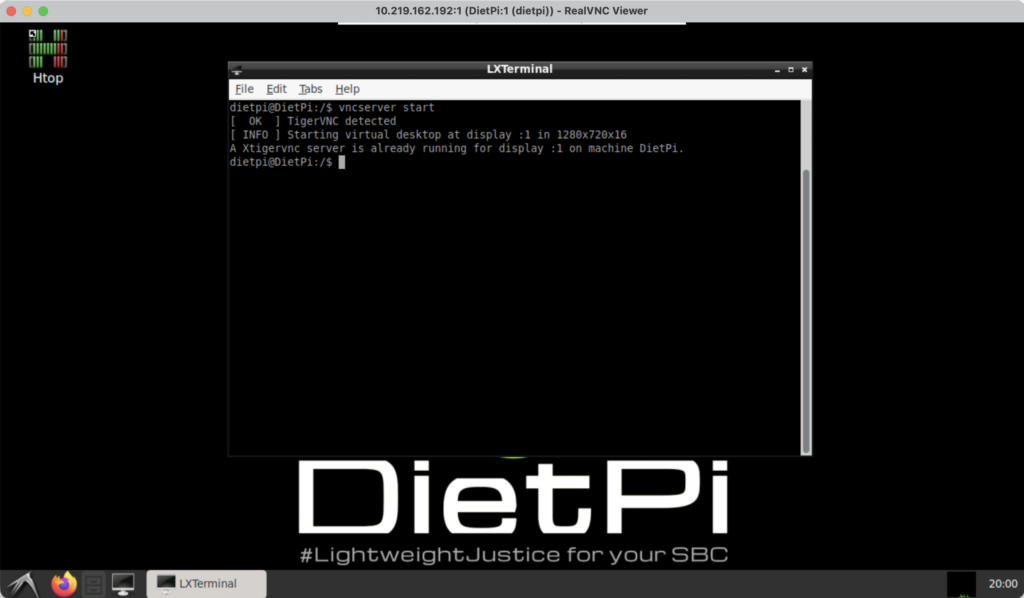
These two numbers are important.
Display:
:1
corresponds to:
5901
Display:
:2
would correspond to:
5902
and so on.
Before connecting, find the Pi’s IP address.
hostname -I
Example:
10.219.162.192
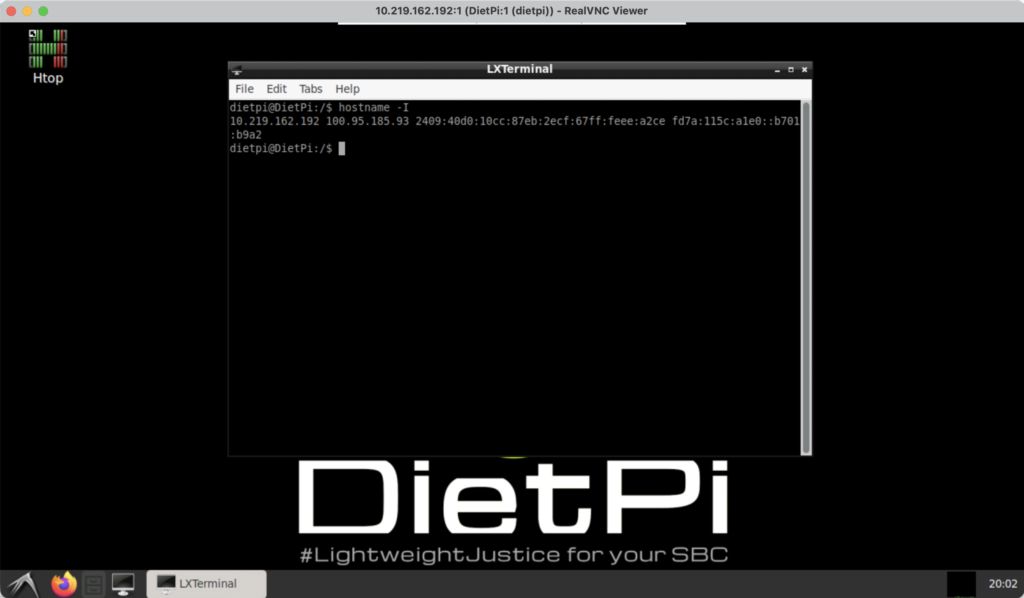
Now connect using:
10.219.162.192:5901
from your VNC viewer.
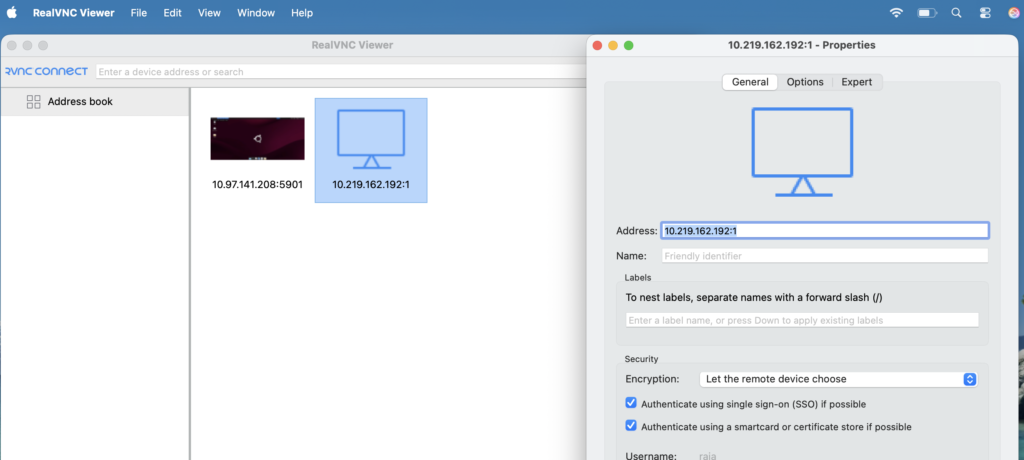
Popular VNC clients include:
After entering the VNC password, the Raspberry Pi desktop appears.
The experience is similar to sitting directly in front of the device.
If the desktop is no longer needed:
vncserver stop
This frees resources and returns the Pi to its lightweight server-focused state.
This is particularly useful on lower-powered boards like the Raspberry Pi Zero 2 W.
Starting VNC manually works, but eventually you’ll want it available after every reboot.
This can be done with a systemd service.
Create a new service:
sudo nano /etc/systemd/system/vncserver.service
Add:
[Unit]
Description=VNC Server (DietPi)

[Service]
RemainAfterExit=yes
PAMName=login
User=dietpi
Environment=HOME=/home/dietpi
ExecStart=/usr/local/bin/vncserver start
ExecStop=/usr/local/bin/vncserver stop

[Install]
WantedBy=multi-user.target
Save the file and reload systemd.
sudo systemctl daemon-reload
Enable automatic startup:
sudo systemctl enable vncserver.service
Start immediately:
sudo systemctl start vncserver.service
Now the VNC server launches automatically whenever the Raspberry Pi boots.
Check service status:
sudo systemctl status vncserver.service
You should see:
active (running)
Another useful check:
ps -ef | grep Xtigervnc
If TigerVNC is running, you’ll see the VNC process listed.
These two commands quickly confirm that the service started correctly.
One thing I quickly realized is that not every Raspberry Pi should boot directly into a desktop.
For NAS and server projects, command-line mode makes much more sense.
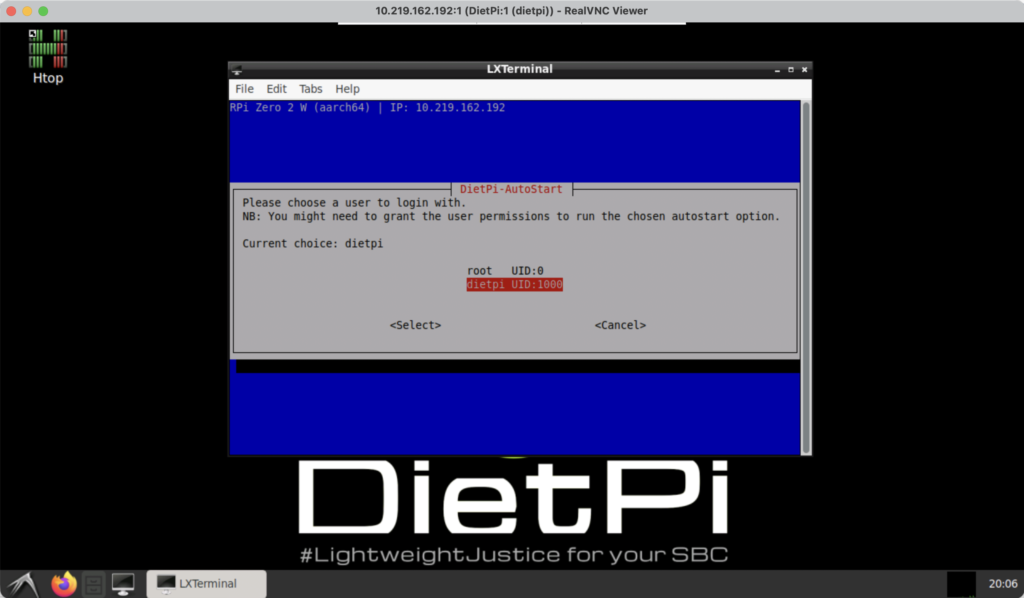
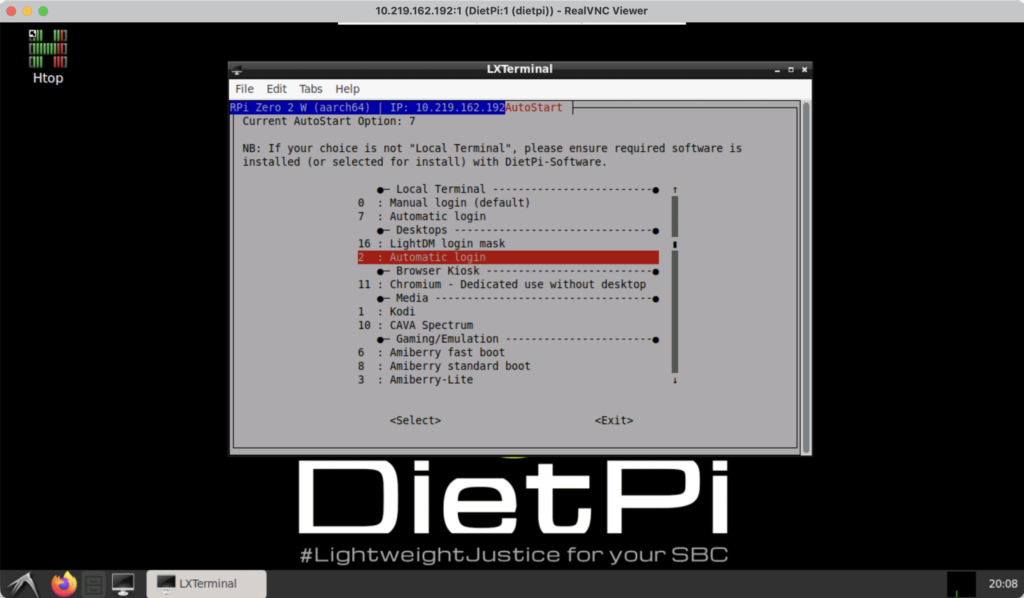
DietPi provides an easy way to configure startup behavior.
Open:
sudo dietpi-autostart

Recommended for:
Select:
Local Terminal
└── Automatic Login
Result:
Boot
 ↓
CLI
 ↓
Auto-login as dietpi
Advantages:
This is the mode I normally use.
If the Pi is mainly used as a workstation or GUI system:
Select:
Desktops
└── Automatic Login
Result:
Boot
 ↓
LightDM
 ↓
LXDE Desktop
 ↓
Auto-login
The desktop appears immediately after startup.
One feature I really like about DietPi is the ability to stay in CLI mode most of the time and launch the desktop only when necessary.
Start desktop:
sudo systemctl start lightdm
This launches the graphical environment without requiring a reboot.
For occasional desktop access, this is often the best compromise.
After finishing desktop work:
sudo systemctl stop lightdm
Restart terminal login:
sudo systemctl restart getty@tty1
Return to terminal:
sudo chvt 1
Now the system is back in lightweight server mode.
To see whether the graphical environment is currently active:
systemctl is-active lightdm
Output:
active
or
inactive
This is useful when troubleshooting remote desktop issues.
At the end of the project, the Raspberry Pi Zero 2 W looked something like this:
Raspberry Pi Zero 2 W
├── DietPi
├── Auto Login (CLI)
├── TigerVNC Server
├── Samba File Server
├── External HDD
│   └── /mnt/hdd
├── Auto Mount via fstab
├── Network Storage
│   └── \\Pi-IP\Storage
└── Remote Administration
The Pi normally runs as a lightweight file server.
When I need a graphical environment, I simply connect through VNC instead of plugging in a monitor.
This keeps resource usage low while still providing desktop access when required.
TigerVNC is one of those tools that becomes incredibly useful once installed.
Most Raspberry Pi administration can be done through SSH, but occasionally having access to a full desktop saves time and effort.
Combined with DietPi’s lightweight design, TigerVNC provides a practical balance between:
For NAS and home server projects, I would still recommend booting into CLI mode and using VNC only when needed. It keeps the Raspberry Pi responsive while preserving the flexibility of a graphical desktop whenever the situation requires it.

Your information will never be shared with any third party